Welcome to this cookbook recipe, your comprehensive guide to adding a chat function to your app effortlessly. In this recipe, we’ll exclusively utilize Backendless Codeless for all the essential logic, complemented by carefully crafted CSS for message styling and positioning. For a complete and detailed tutorial, we recommend pairing this recipe with the video tutorial linked below, which offers in-depth, step-by-step guidance:
")
-
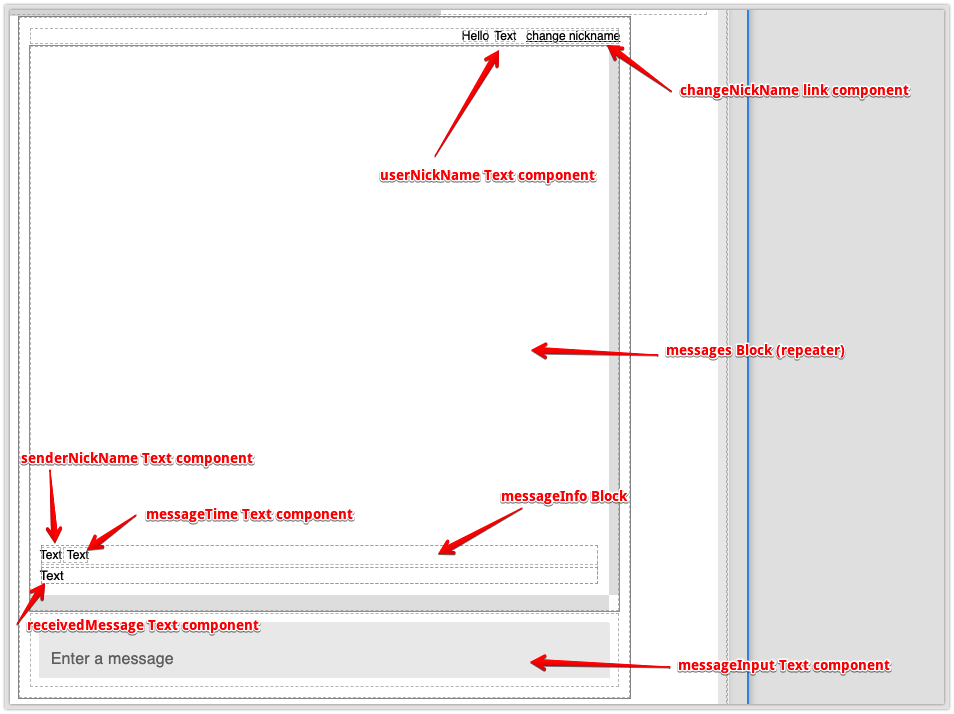
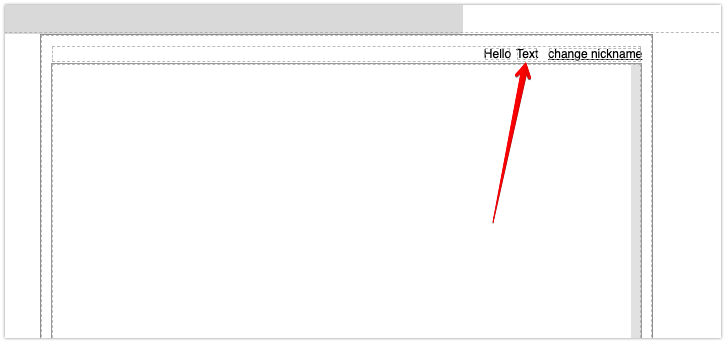
Create a page, and add all the layout components as instructed in the video. Throughout this recipe, the components will be identified as shown below:
-
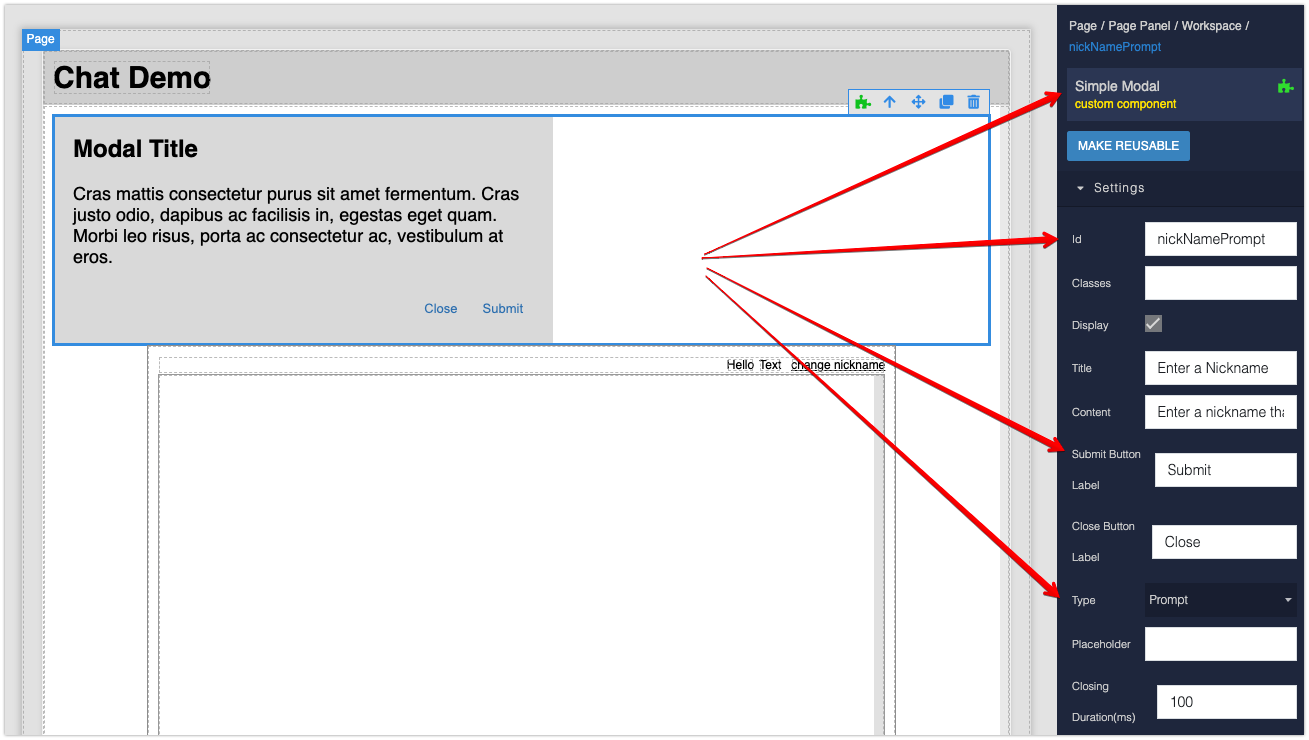
Install the
Simple Modalcomponent on theCOMPONENTStab. Add the installed component to the page and configure it as shown below (make sure to assign thenickNamePromptid to the component on the page):
-
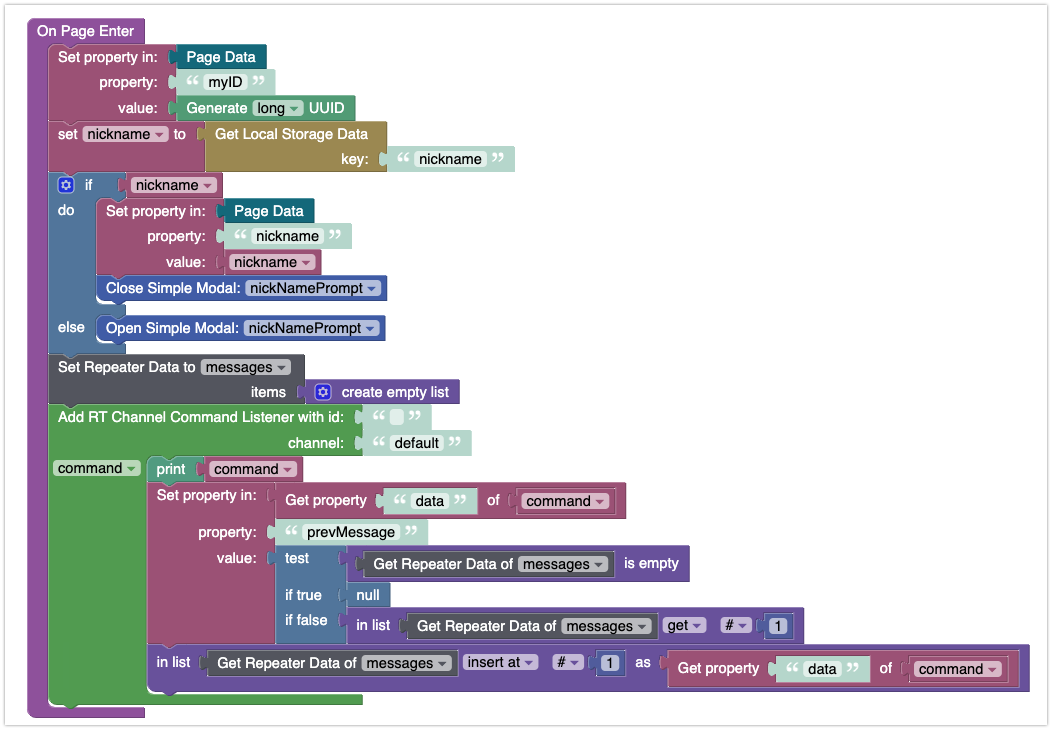
Add the following logic to the Page’s
On Page Enterevent:
-
Add the following logic to the
On Key Downevent of themessageInput Text Component
-
Add the following logic to the
messageInfo Block’s Visibility Logic:
-
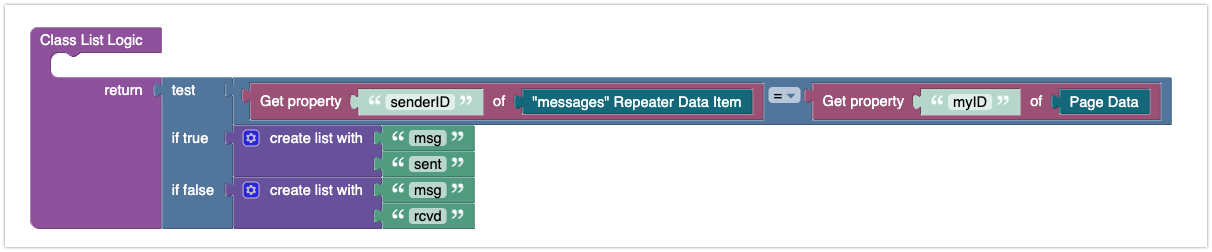
Add the following logic to the
Class List Logicof thereceivedMessage Text Component:
-
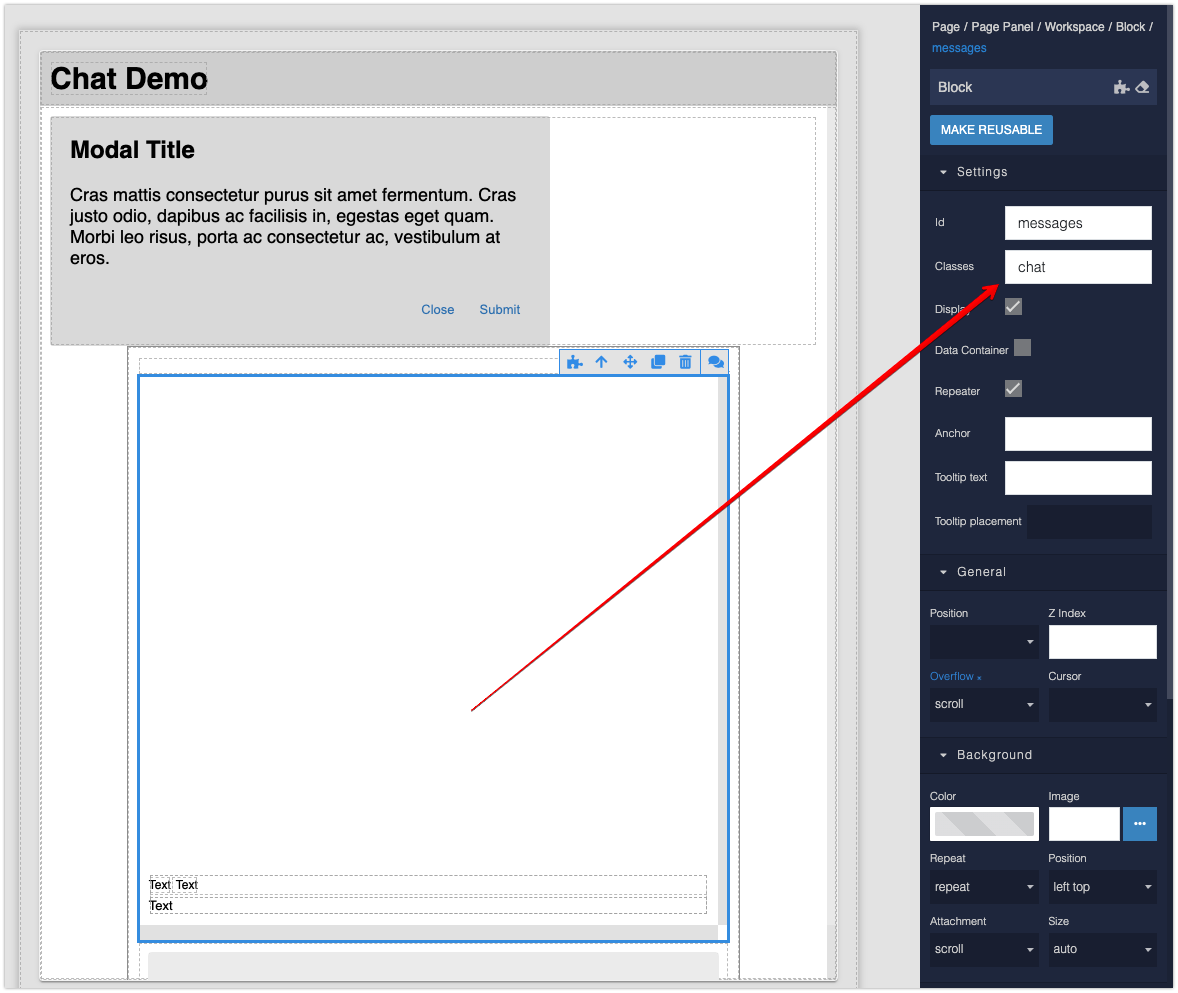
Assign
chatCSS class to themessagesBlock (this is the Block marked as repeater):
-
Switch to the
THEMEtab and create a new extension. Add the following styles to the extension:


.chat {
  --rad: 20px;
  --rad-sm: 3px;
  font: 16px/1.5 sans-serif;
  display: flex;
  flex-direction: column;
}


.msg {
  position: relative;
  max-width: 75%;
  padding: 7px 15px;
  margin-bottom: 2px;
}

.msg.sent {
  border-radius: var(--rad) var(--rad-sm) var(--rad-sm) var(--rad);
  background: #42a5f5;
  /* moves it to the right */
  margin-left: auto;
}

.msg.rcvd {
  border-radius: var(--rad-sm) var(--rad) var(--rad) var(--rad-sm);
  background: #f1f1f1;
  /* moves it to the left */
  margin-right: auto;
}

.msg.sent span {
    color: #fff;
}

.msg.rcvd span {
    color: #555;
}

/* Improve radius for messages group */

.msg.sent:first-child,
.msg.rcvd+.msg.sent {
  border-top-right-radius: var(--rad);
}

.msg.rcvd:first-child,
.msg.sent+.msg.rcvd {
  border-top-left-radius: var(--rad);
}


/* time */

.msgBefore {
  font-size: 0.8rem;
  color: #888;
  white-space: nowrap;
}

.msg.sent::before {
  right: 15px;
}

.msg.rcvd::before {
  left: 15px;
}


/* Show time only for first message in group */

.msg:first-child::before,
.msg.sent+.msg.rcvd::before,
.msg.rcvd+.msg.sent::before {
  /* Show only for first message in group */
  display: block;
}
-
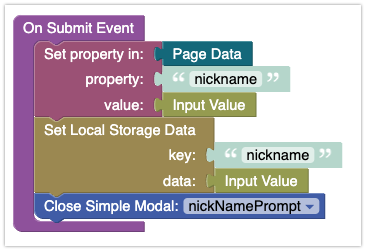
Select the
Simple Modalcomponent (identified asnickNamePrompt) and add the following logic to theOn Submit Event:
-
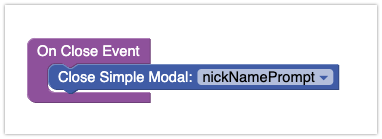
Add the following logic to the
On Close Eventof the sameSimple Modalcomponent referenced in the previous step:
-
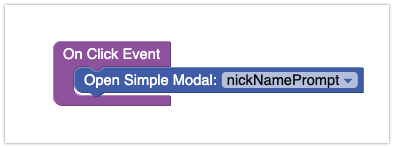
Add the following logic to the
On Click Eventof thechangeNickName link component:
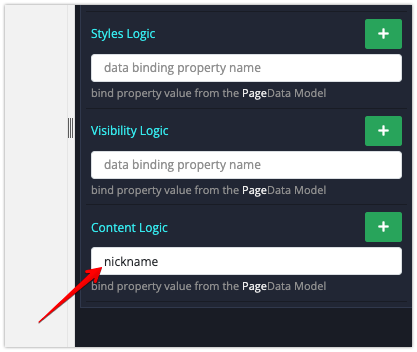
Data Bindings
- Bind
Content Logicof the following component to thenicknameproperty in Page Data:
By that I mean do the following:
- Bind
senderNickName Text Component’s Content Logic to thesenderproperty in its data model - Bind
messageTime Text Component’s Content Logic to thetimeproperty in its data model - Bind
receivedMessage Text Component’s Content Logic to themessageproperty in its data model. - Bind
messageInput Text Component’s Value Logic to themessageproperty in the Page Data data model.
That should be it!
If you have suggestions for how this chat implementation should be improved or enhanced, please leave a comment.
Happy Coding!