Often on sites there is a need to download a document in PDF format to the user’s device. This can be the results of filling out a form, an invoice, a ticket, an invitation, etc.
In this example, we will walk through the creation of a simple invoice using data obtained from the user interface and from table.
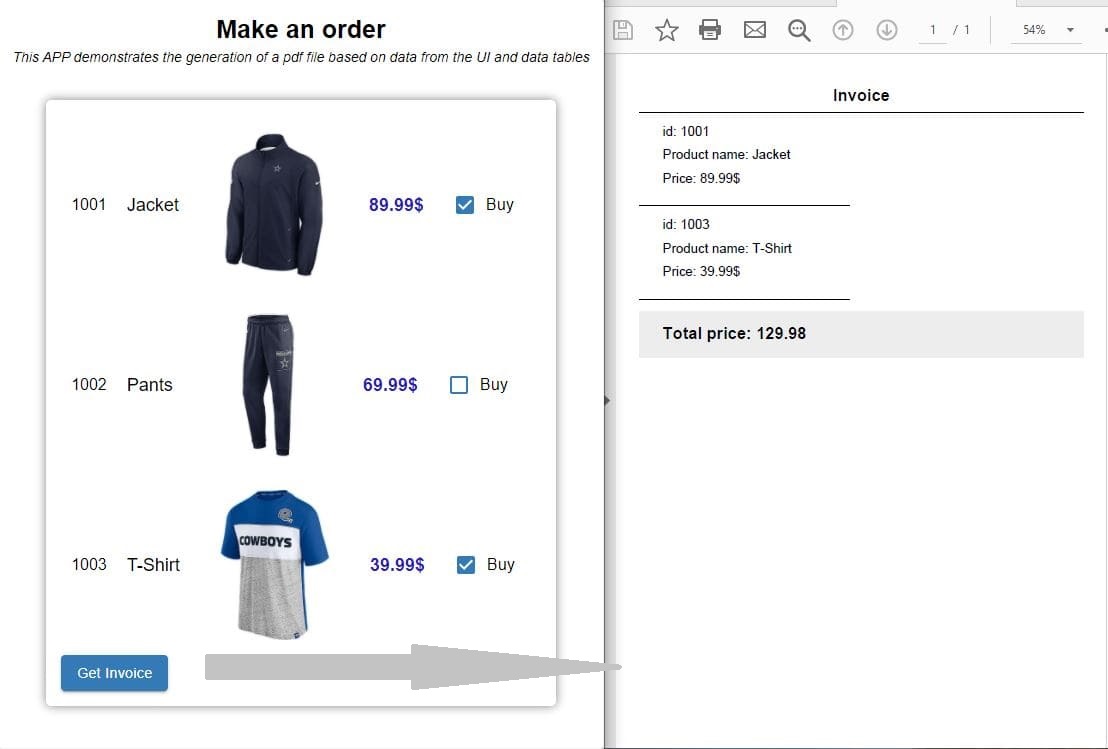
Our final goal is to create a simple order form where you can select a range of products.
By clicking on the "Get Invoice" button, a PDF document should be generated. It displays only those products that the user has selected. This document must be saved in the Backendless file system and opened in a new browser tab.
The process of creating an application will consist of the following stages:
- Creating a data table and user interface in the UI Builder.
- Creation of API service and receiving data from table and UI into it.
- Connecting the
“jsPDF”module to the API service. - Creating a PDF document using the
"jsPDF". - Connecting the API service to the UI.
1. Creating a data table and user interface in the UI Builder.
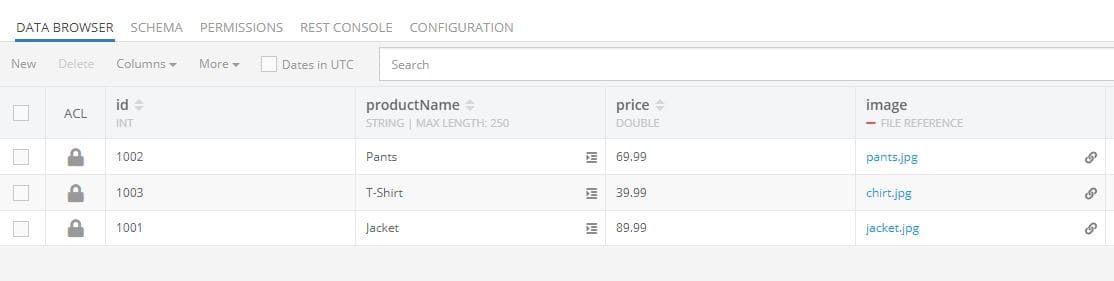
The data table "Product" has a very simple structure and does not require any special explanations.
The basis of the user interface is a container that has the “Dynamic List Behavior” checkbox checked.
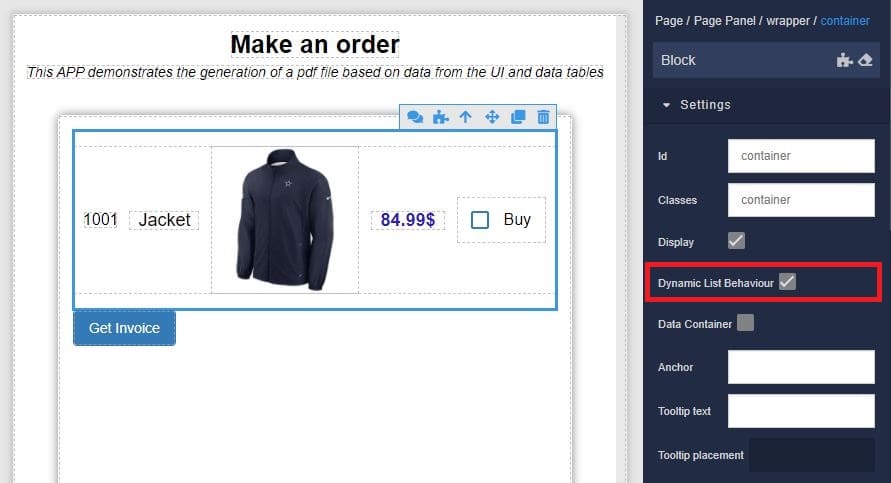
Each element of the container except “chexkbox” is bound to the data table using the “Content Logic” properties, and for the picture “Source URL Logic”. The names of their properties are the same as the names of the columns in the “Product” table.

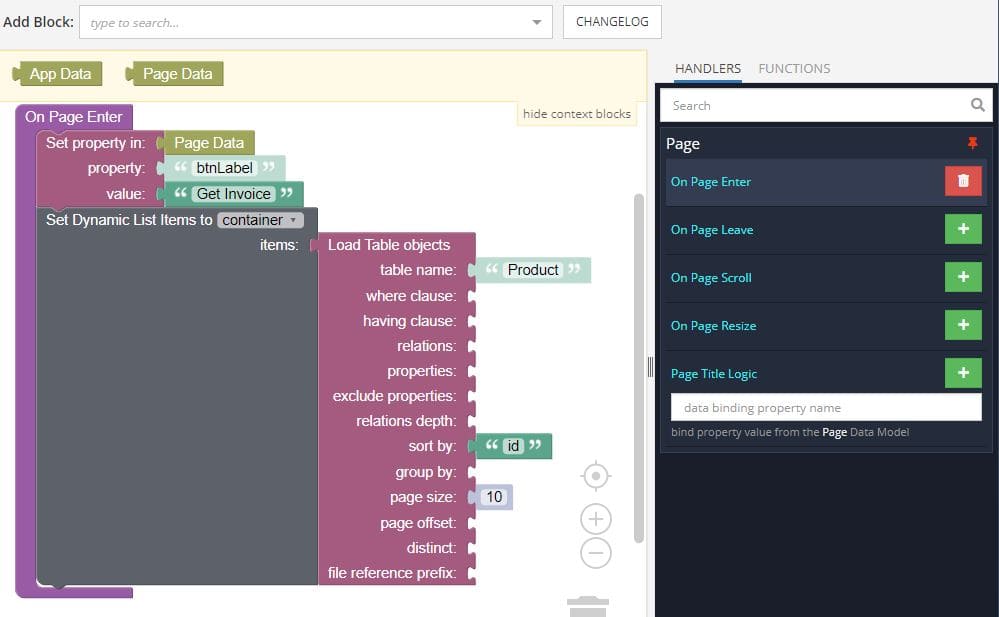
On the “On page Enter” event, data is loaded from the “Product” table into the user interface. Also, the label is assigned here to the "Get Invoice" button.
2. Creation of API service and receiving data from table and UI into it
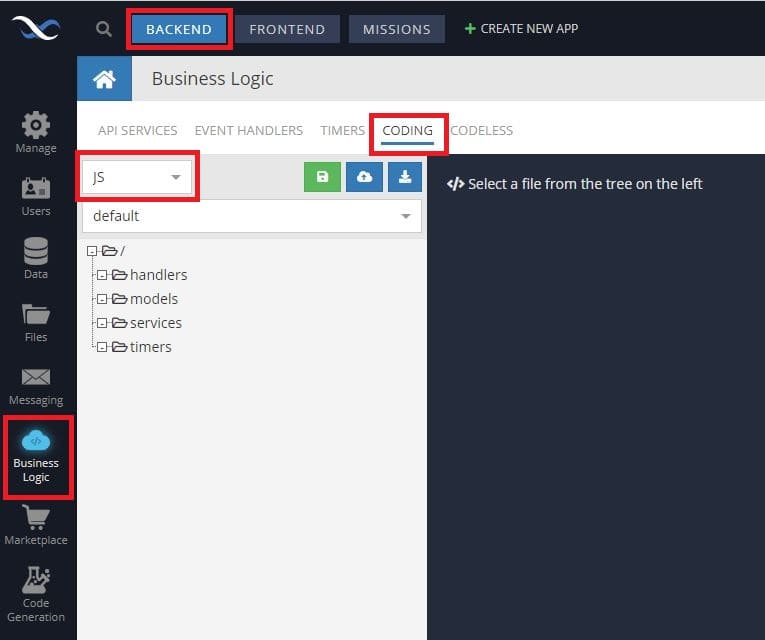
To create an API service, go to the Backend section of the Backendless Console.
(Backend –BusinessLogic-Coding-JS)
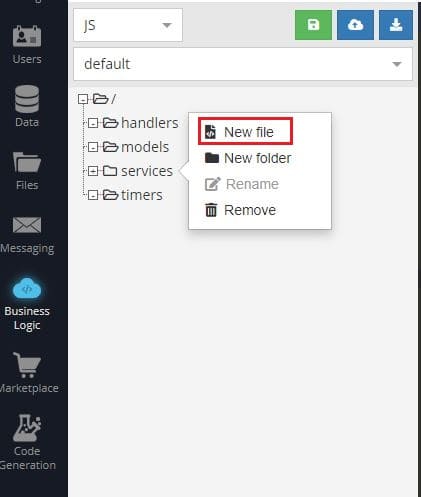
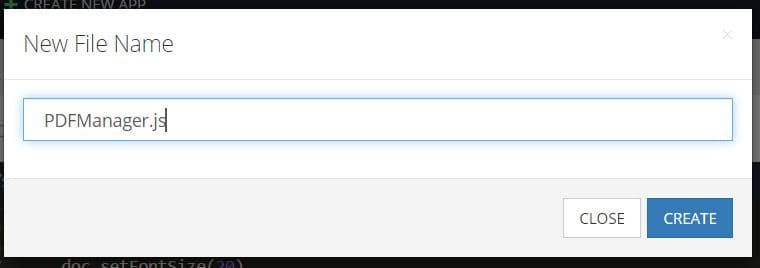
Create a new file “PDFManager.js” in the service folder
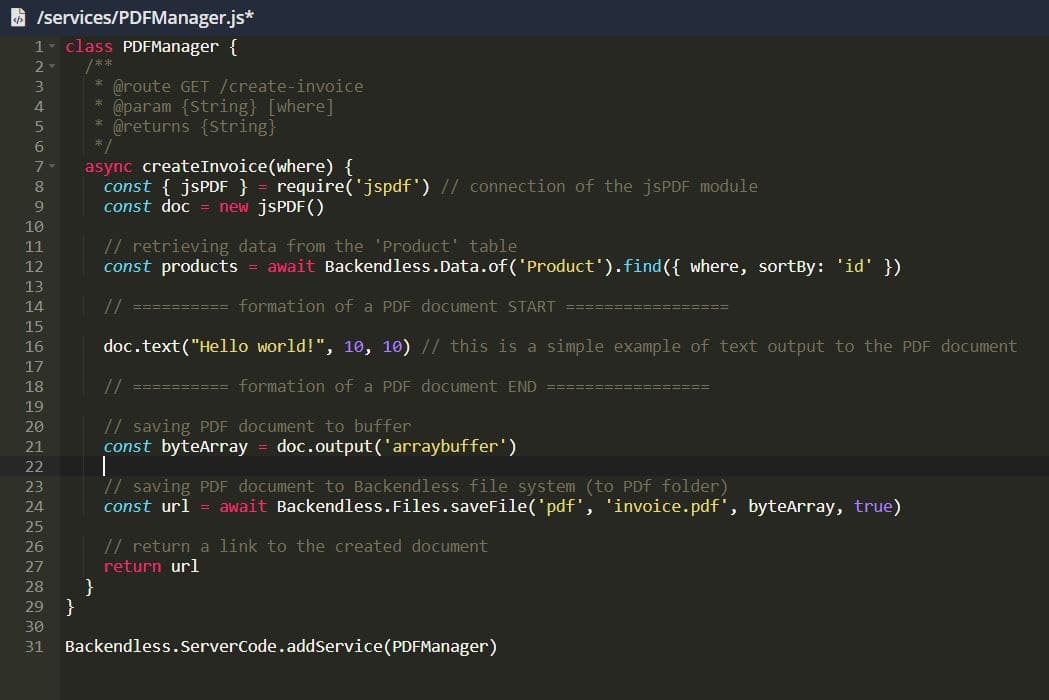
This file will contain the code of our “PDFManager” service with the “createInvoice” method. The “createInvoice” method receives information from the user interface about which products the user has selected in the form of a query to the database (“where”). Using “where” the service gets the necessary data from the “Product” table and writes it to the products constant.
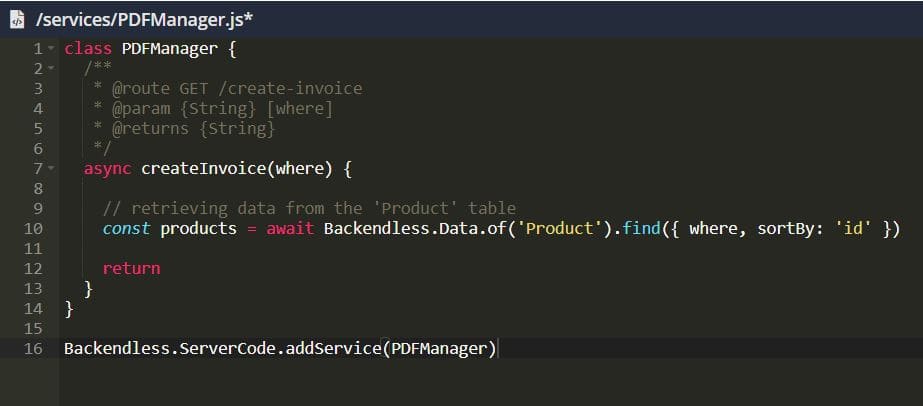
class PDFManager {
  /**
   * @route GET /create-invoice
   * @param {String} [where]
   * @returns {String}
   */
  async createInvoice(where) {
    // retrieving data from the 'Product' table
    const products = await Backendless.Data.of('Product').find({ where, sortBy: 'id' })

    return
  }
}
Backendless.ServerCode.addService(PDFManager)
3.Connecting the “jsPDF” module to the API service.
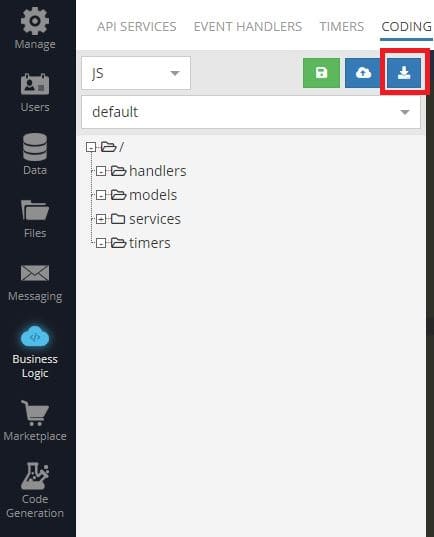
To connect the “jsPDF” module to the API service, you need to download the project to your computer. "Download Project" button.
Note: if necessary, you can connect any other module that generates a PDF document (for example “PDFMake”). The connection principle will be the same.
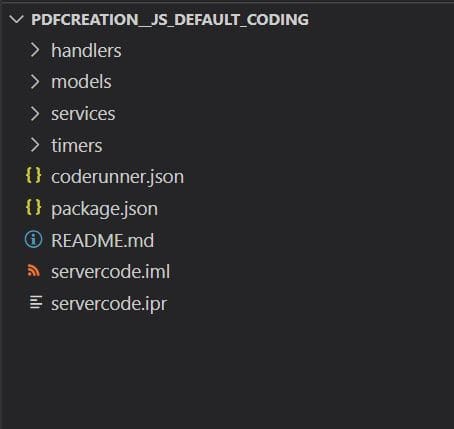
After downloading and unpacking, the project structure will look like this:
To further install the module, you must have Node.JS installed on your computer (you can easily install node.JS from this link.
Next, you need to open a terminal with a command line in the project folder and execute several commands sequentially:
-
npm i(install Backendless CodeRunner dependencies);
-
npm install jspdf –save(install “jsPDF” module);
-
npm run deploy(this command will download and deploy the service with the “jsPDF” module on the server);
After this operation, the folder structure will look like this:
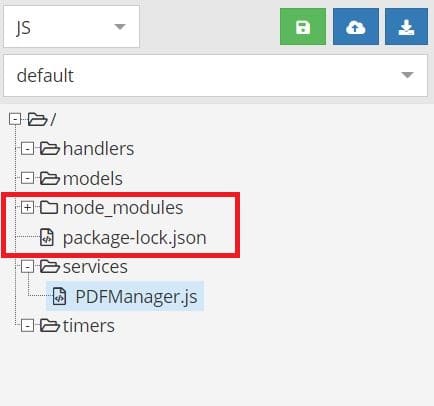
The following commands are used to connect the “jsPDF” module:
const { jsPDF } = require("jspdf")
const doc = new jsPDF()
Then we output our document to the buffer and save it in the Backendless file system:
const byteArray = doc.output('arraybuffer')
const url = await Backendless.Files.saveFile('pdf', 'invoice.pdf', byteArray, true)
The command “Backendless.Files.saveFile” will return us the URL of the saved file, which we return to the UI:
return url
class PDFManager {
  /**
   * @route GET /create-invoice
   * @param {String} [where]
   * @returns {String}
   */
  async createInvoice(where) {
    const { jsPDF } = require('jspdf') // connection of the jsPDF module
    const doc = new jsPDF()

    // retrieving data from the 'Product' table
    const products = await Backendless.Data.of('Product').find({ where, sortBy: 'id' })

    // ========== formation of a PDF document START =================

    doc.text("Hello world!", 10, 10) // this is a simple example of text output to the PDF document

    // ========== formation of a PDF document END =================

    // saving PDF document to buffer
    const byteArray = doc.output('arraybuffer')

    // saving PDF document to Backendless file system (to PDf folder)
    const url = await Backendless.Files.saveFile('pdf', 'invoice.pdf', byteArray, true)

    // return a link to the created document
    return url
  }
}

Backendless.ServerCode.addService(PDFManager)
4. Creating a PDF document using “jsPDF”.
The "jsPDF" module has a huge number of settings and capabilities that we cannot cover in this article. You can find complete documentation on the module at the link: jsPDF (License MIT).
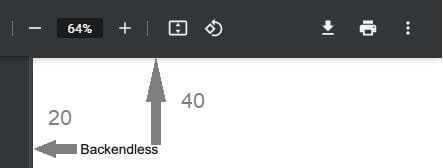
Here is just an example of the output of simple text in a PDF document:
doc.text("Backendless", 20, 40);
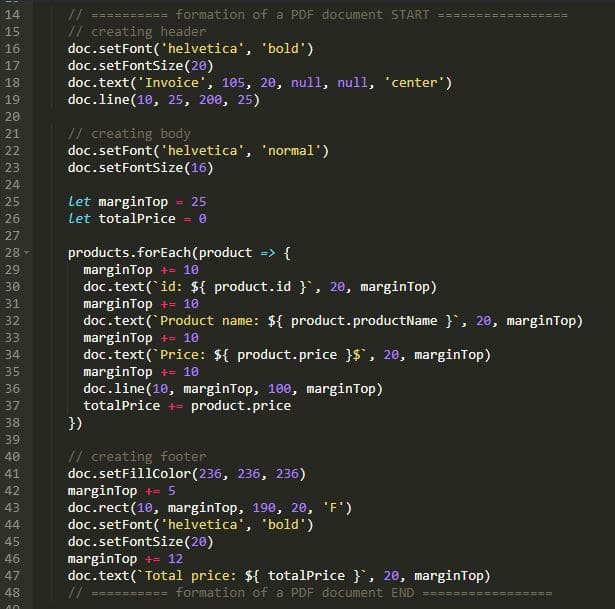
A fragment of the code that forms a PDF document and outputs data from the products constant there is shown in the figure below. It also calculates the total price of all products.
As a result, the code of our service will look like this:
class PDFManager {
  /**
   * @route GET /create-invoice
   * @param {String} [where]
   * @returns {String}
   */
  async createInvoice(where) {
    const { jsPDF } = require('jspdf') // connection of the jsPDF module
    const doc = new jsPDF()

    // retrieving data from the 'Product' table
    const products = await Backendless.Data.of('Product').find({ where, sortBy: 'id' })

    // ========== formation of a PDF document START =================
    // creating header
    doc.setFont('helvetica', 'bold')
    doc.setFontSize(20)
    doc.text('Invoice', 105, 20, null, null, 'center')
    doc.line(10, 25, 200, 25)

    // creating body
    doc.setFont('helvetica', 'normal')
    doc.setFontSize(16)

    let marginTop = 25
    let totalPrice = 0

    products.forEach(product => {
      marginTop += 10
      doc.text(`id: ${ product.id }`, 20, marginTop)
      marginTop += 10
      doc.text(`Product name: ${ product.productName }`, 20, marginTop)
      marginTop += 10
      doc.text(`Price: ${ product.price }$`, 20, marginTop)
      marginTop += 10
      doc.line(10, marginTop, 100, marginTop)
      totalPrice += product.price
    })

    // creating footer
    doc.setFillColor(236, 236, 236)
    marginTop += 5
    doc.rect(10, marginTop, 190, 20, 'F')
    doc.setFont('helvetica', 'bold')
    doc.setFontSize(20)
    marginTop += 12
    doc.text(`Total price: ${ totalPrice }`, 20, marginTop)
    // ========== formation of a PDF document END =================

    // saving PDF document to buffer
    const byteArray = doc.output('arraybuffer')

    // saving PDF document to Backendless file system (to PDf folder)
    const url = await Backendless.Files.saveFile('pdf', 'invoice.pdf', byteArray, true)

    // return a link to the created document
    return url
  }
}

Backendless.ServerCode.addService(PDFManager)
5. Connecting the API service to the UI.
To connect the API service to the UI, you need to go to the Frontend section of the Backendless Console, go to the logic of the “Get Invoice” button (the “On Click Event” handler), and select the created service.
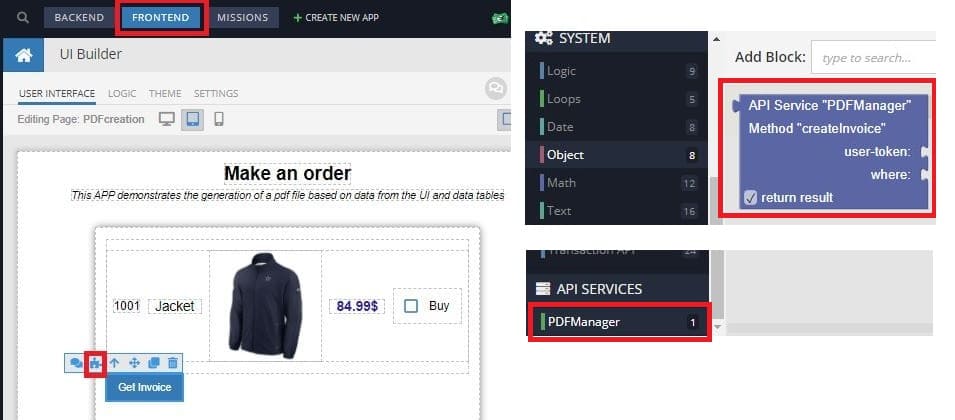
The logic of the "Get invoice" button includes:
-
formation of the expression “Where Clause” based on the choice of products made by the user;
-
checking that the user has made a choice;
-
API service call;
-
navigates to a new browser tab with a loaded PDF document using the URL received from the API service.
Also, while the"On Click Event"handler is running, the label on the button changes.
