Accordions are useful when you want to toggle between hiding and showing large amount of content.
So, let’s start to build acordion in UI builder:
Check out a Demo of the Accordion.
Accordion Structure
The general structure of the component is shown below. For clarity, element IDs are named the same as classes. Each ID must be given a meaningful and unique name.
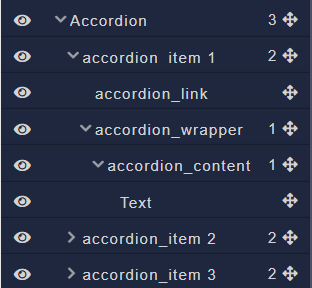
Use the Block component for Accordion, accordion_item, accordion_wrapper, accordion_content .

Use the Checkbox component for each accordion_link .
![]()
Use any component that suits you to fill the accordin_content blocks. I used the Text component.
![]()
After adding content, let’s reset the styles using Drop default styles

Styles
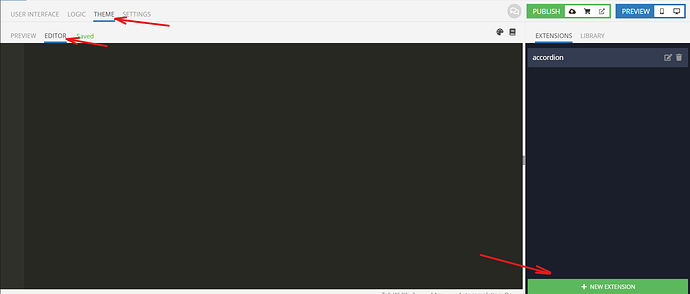
To create styles, switch to the Theme tab. Inside the page, select the Editor and Extensions tabs.
Create an Extension. We recommend you name the extension according to the component name for convenience.
The following code is written using CSS LESS.
    .accordion{
      flex-direction: column;
      width: 300px;
    }
    .accordion_item{
      display: flex;
      flex-direction: column;
    }
    .accordion_link{
      border-bottom: 2px solid #F3F3F3;
      padding-bottom: 10px;
      cursor: pointer;
      .MuiButtonBase-root{
        display: none;
      }
    }
    .accordion_content{
      height: 100%;
      margin: 0;
      padding: 10px;
    }
    .accordion_wrapper{
      height: 0;
      overflow: hidden;
      background-color: #F3F3F3;
      transition: all .3s ease-in-out;
    }
As a result, we will get a scheme like this
Logic
Next, we describe the logic for the accordion items and change the appearance of the items – by clicking on the accordion_link element.
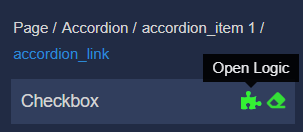
To do this, click on the element, then on the puzzle icon.
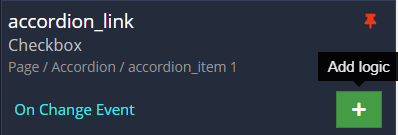
You need to add logic on change event.
Then add the Codeless logic for adding and removing element classes on click.
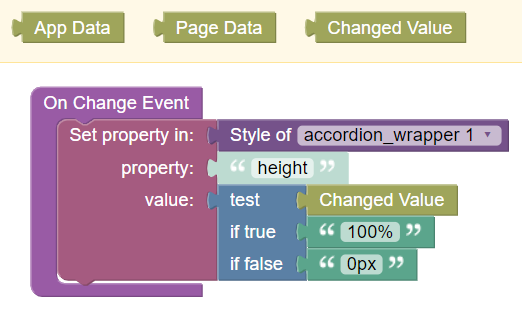
Let’s walk through what this logic is doing, in plain English:
We set height of accordion_wrapper depending on the Changed Value. (if true - 100%, if false - 0px)
You need to paste this logic to another accordion_link and accordion_wrapper
Done! Now you know how to quickly and easily create an accordion for your application using Backendless UI Builder.
Thanks for reading, and as always, happy codeless coding!
