As the users of your app create new things objects in the database, the use-case of retrieving data that “belongs” to the user comes up quite frequently. Whether your app users create orders, invoices, or social media posts, the mechanism for retrieving data that’s associated (i.e. belongs) to the user is important. In this recipe, I will describe the simplest and the most secure way to get the data that belongs to the currently logged-in user.
Let’s review some background information first. It will be important to keep it in mind when you review the approach I am going to describe.
- First of all, it is assumed that there is a logged-in user in your app. If there is no logged in user, there is no clear understanding of the identity of whoever stores data in your database.
- The logged-in user could be authenticated with any approach supported by Backendless. Whether it is phone-based auth or a social login or the built-in username/password login, the recipe described below will work just fine.
- When your app with a logged-in user uses the API to store an object in the database, the new object will be “tagged” with the
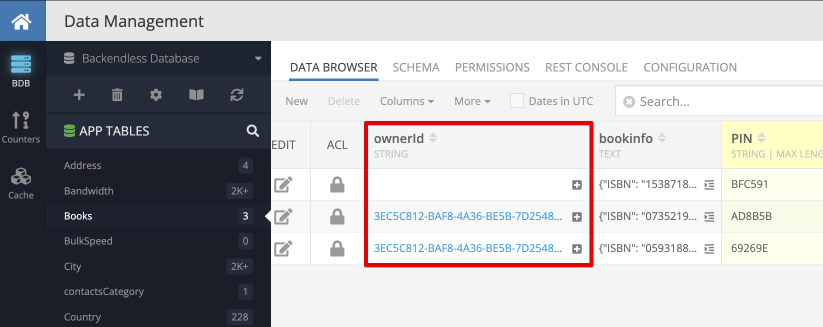
objectIdvalue of the currently logged-in user. You can actually see it in the database by inspecting theownerIdcolumn of your database. Here’s my sample data table, as you can see two of the objects have a value in theownerIdcolumn (the third object was created manually in Backendless console, so it is not attributed to any user). The values in the screenshot below areobjectId’s of a user from theUserstable:
- You do not need to do anything special (or actually nothing extra at all) for the “linkage” between your objects and the owner (i.e. a user from the Users table) to show up - Backendless will do it for you.
Now that you understand how data is related to users, let’s review the process of configuring Backendless so that users get only the data that belongs to them.
The process of retrieving objects that are “linked” to the currently logged-in user is called Owner Policy. You may occasionally see it in the comments from our support staff with a reference to this doc. While the doc is pretty good (IMHO - I was the one who wrote it, ![]() ), it may not be clear how to utilize Backendless Console to actually configure Owner Policy to return the objects owned by the currently logged-in user. The change to do that is quite simple though:
), it may not be clear how to utilize Backendless Console to actually configure Owner Policy to return the objects owned by the currently logged-in user. The change to do that is quite simple though:
- Navigate to the Data screen of your app and select a database table. The table you select is where you will be configuring the Owner Policy. If you need it for multiple tables, repeat these steps for each.
- Click the
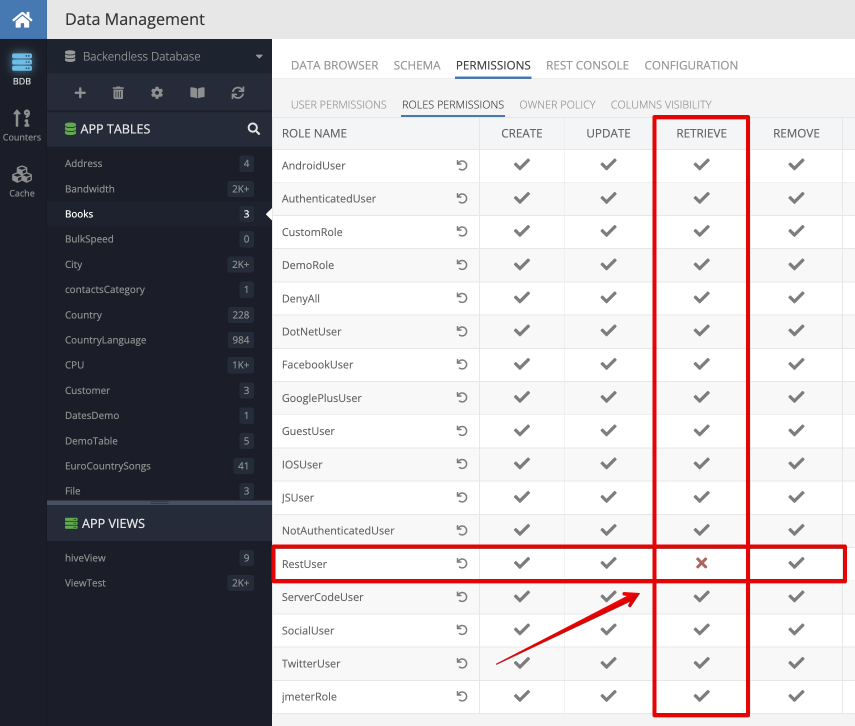
PERMISSIONStab and select theROLES PERMISSIONSsubtab. - Now we need to disable some permissions for some roles. I will describe a specific use case, but you should be able to extrapolate this knowledge to other similar use cases. Let’s consider the scenario of data retrieval - loading data objects from the database that belong to the currently logged-in user. The retrieval will be done using REST, which means you will be using REST API Key for the API calls. Now that we identified the database operation (Retrieval) and API client (REST), locate the permission at the intersection of
RestUserrow andRETRIEVEcolumn and click the checkmark until it becomes red X as shown below:
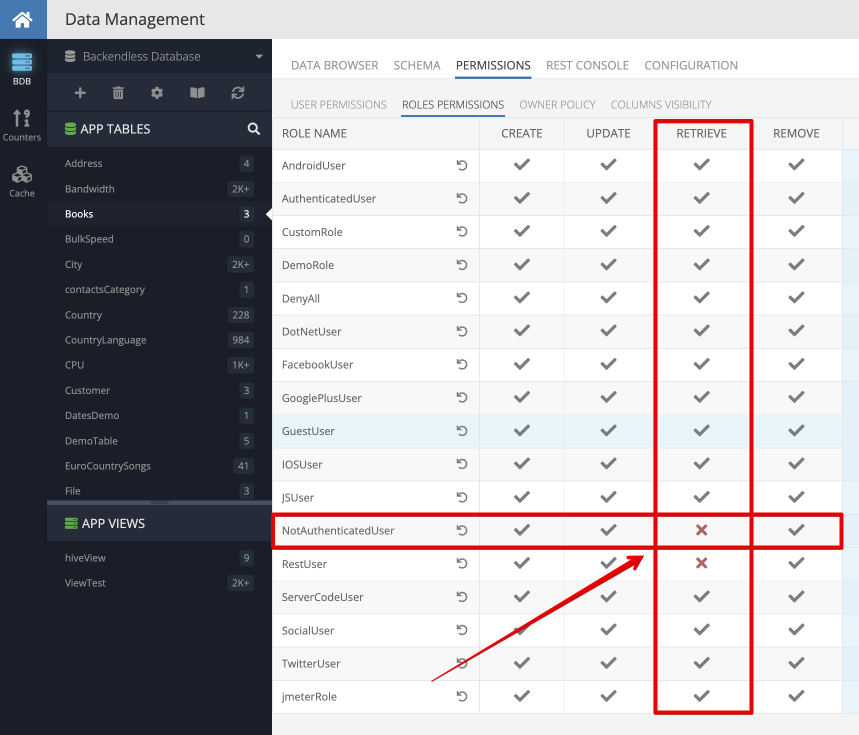
- Similar to what you did above, deny access to the
RETRIEVEoperation for theNotAuthenticatedUserrole (this is needed so that users who are not logged-in, would not be able to get any data):
- Switch to the
OWNER POLICYsubtab and in theRETRIEVEcolumn click the icon until it becomes a green check:

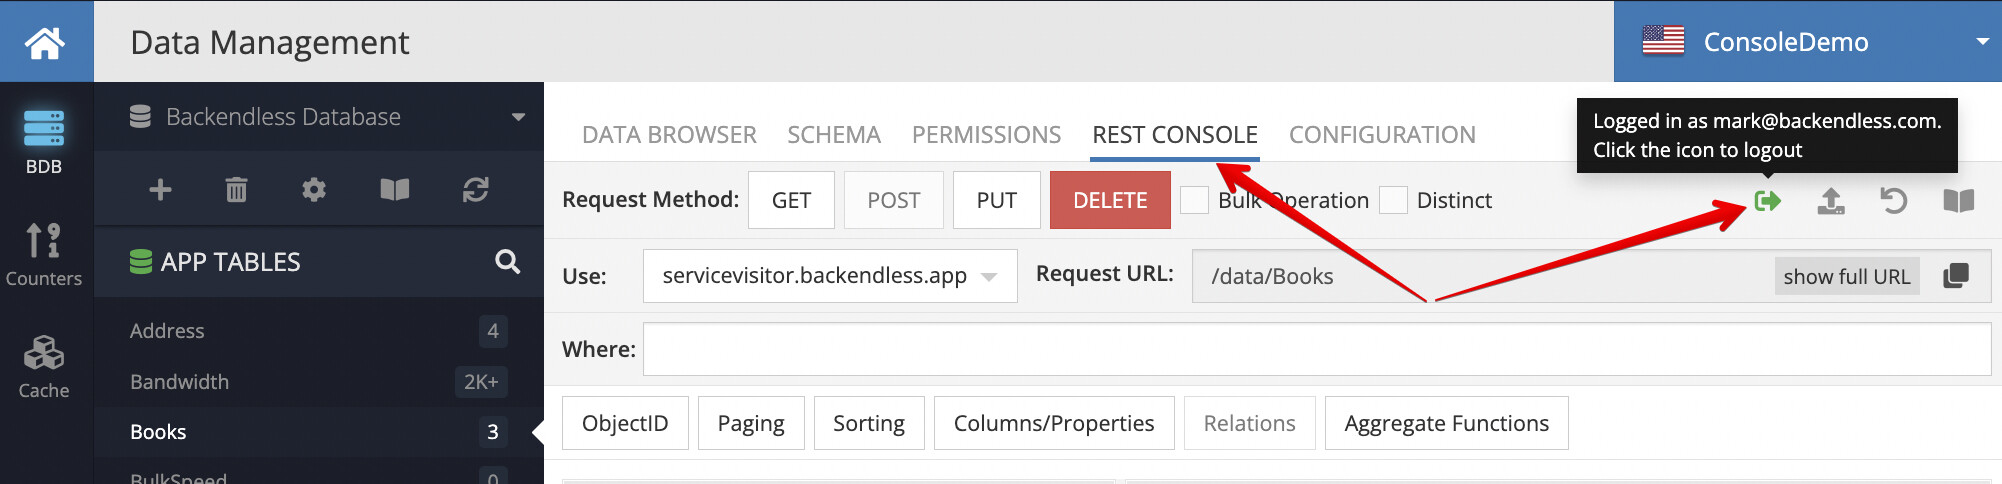
That is all. Let’s test the set up. Click the REST CONSOLE subtab and click the User Login icon. The icon will display a login popup. You can use it to login as a user in your app and impersonate the usage of the API the same way your app would use it when it has a logged-in user. In the screenshot below I am logged in as myself (since I have an account with my email address in the Users table of the app):
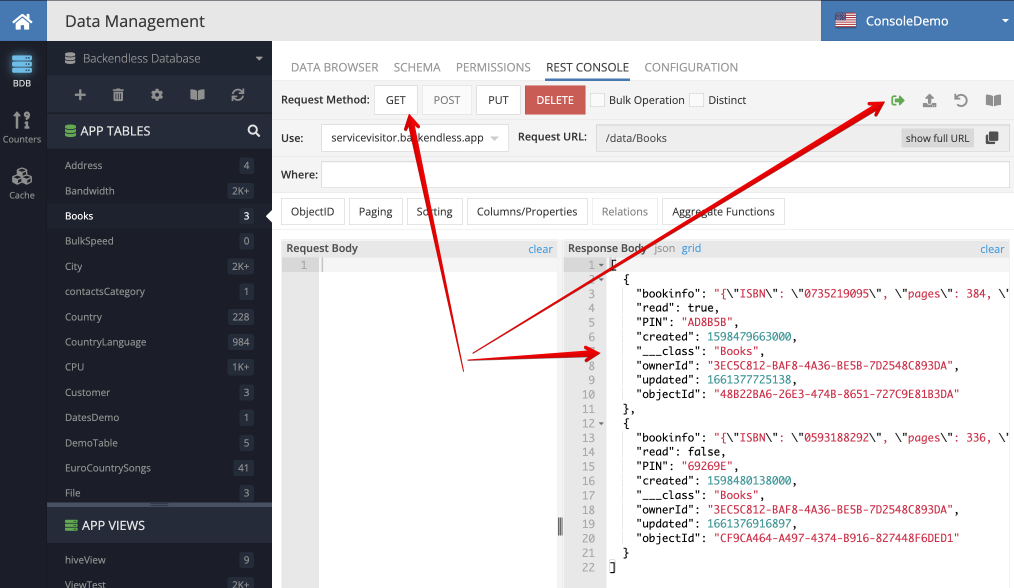
Now click the GET button and you can inspect the response. In my case, I get two objects that belong to the user I am impersonating in REST Console:
Hope this helps!
Happy coding!