Unlock the potential of Artificial Intelligence and take your UI app to new heights with the seamless integration of OpenAI ChatGPT API service, now available on the Backendless Marketplace! This exciting addition empowers developers to harness the incredible capabilities of ChatGPT and enrich their applications with AI-driven functionalities. In this article, we’ll delve into a step-by-step guide on how to integrate the ChatGPT API service into your UI Builder app. By understanding the data flow and implementation process, you’ll be well-equipped to explore a wide array of possibilities.
To get started, head over to the Marketplace by navigating to BACKEND > Marketplace > API Services and locate the OpenAI API Service. Follow the service’s installation instructions.
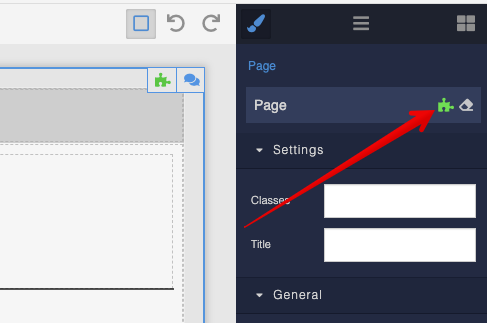
Once the service is installed, navigate to FRONTEND > UI Builder. The first step would be creating a ChatGPT session. This should be done early on in the life cycle of your UI app. For instance, a good candidate for this is the On Page Loaded event of the default page. Select the page and navigate to the Logic section:
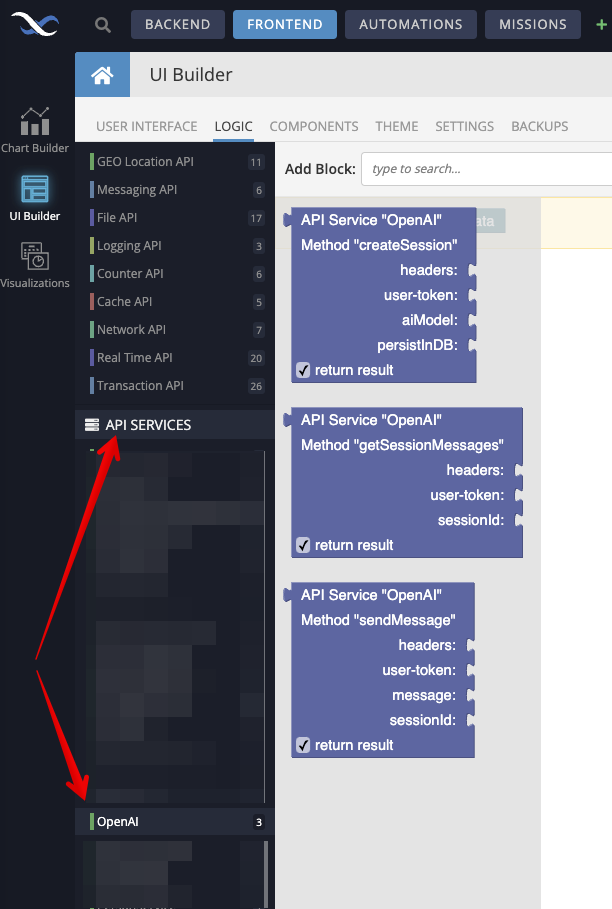
In the Logic Editor screen, you will see a list of available API services on the left side of the interface, the OpenAI service will also appear there with the Codeless blocks corresponding to the available service methods:
The following logic creates a new ChatGPT session. Notice the session ID is stored in Page Data. This will work for the demo created in this article, however, if your app has more than one page and you plan on using the AI integration on a page other than the default one, it would make sense to place the session ID into App Data instead:
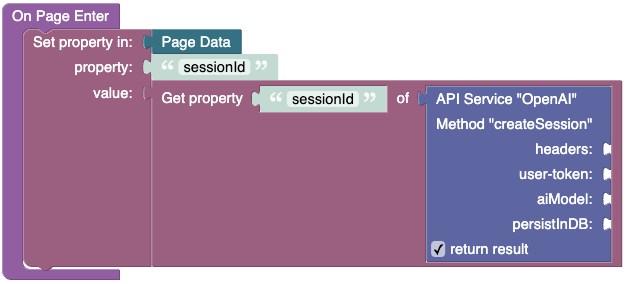
The sessionId property will be used in the API requests to communicate with OpenAI.
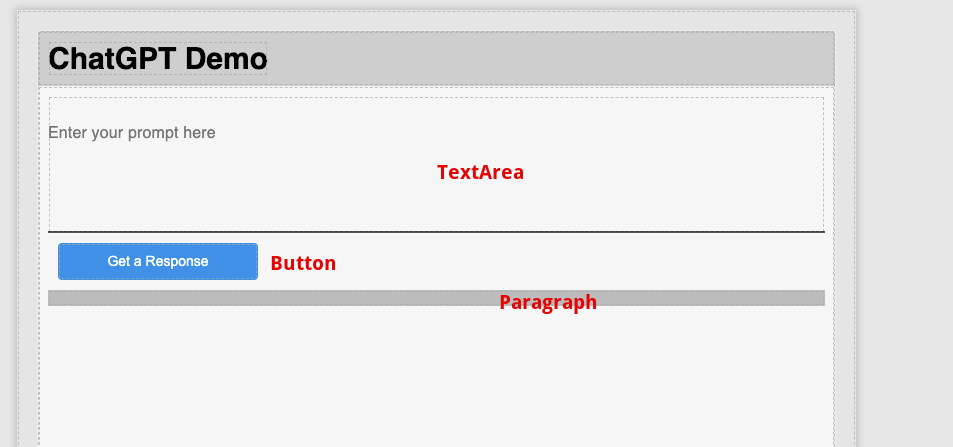
Return to the USER INTERFACE tab and add the following components as shown below:
TextArea- this is where you will enter a prompt to be sent to ChatGPTButton- clicking the button will send the prompt and get a responseParagraph- it will render AI responses
Let’s establish data binding as it will be critical to get the demo working:
- Click the
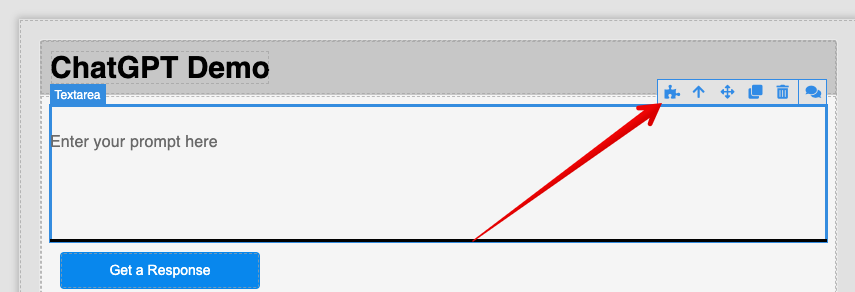
TextAreacomponent and navigate to its Logic:
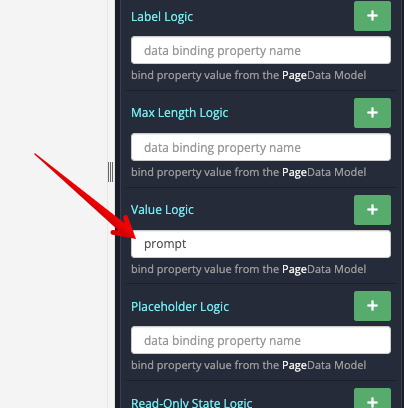
- Locate the
Value Logichandler and assign a property name, let’s call itprompt. What this will do is automatically place any value entered in the TextArea into thepromptproperty ofPage Data:
- Return to
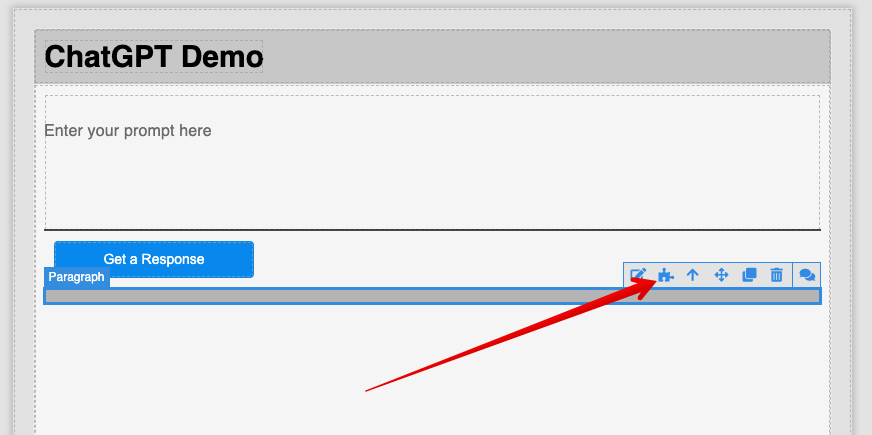
USER INTERFACEand select the Paragraph component. Switch to its logic:
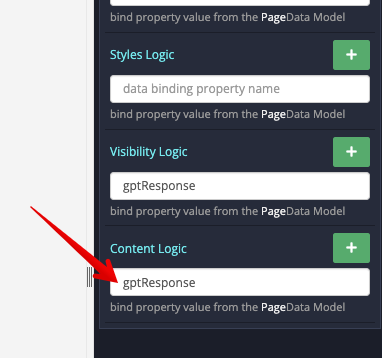
- Locate the
Content Logichandler and assign a property name, let’s call itgptResponse. This will automatically render a response from AI in the paragraph when thegptResponseproperty is updated inPage Data:
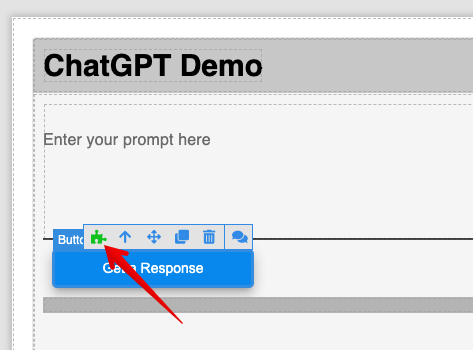
Now that the data-binding is in place, what’s left is to add the logic for sending a prompt to AI and get the response. The logic will be in the Button’s On Click Event. Select the Button in the USER INTERFACE and click the Logic icon:
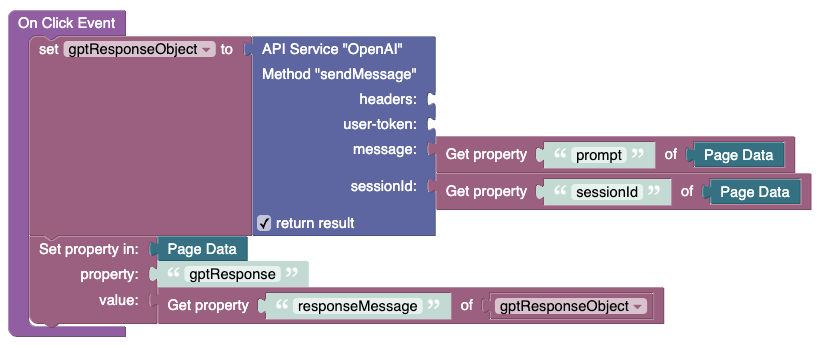
Below is the logic for handling the button click. Please note the following details:
- The
messageconnector gets its value from thepromptproperty inPage Data. The data gets there when the user enters anything in theText Areacomponent. - The
sessionIdconnector gets its value from thesessionIdproperty inPage Data. The value of that property is populated when the page is loaded - this is the first thing we did in the article. - The result of the
sendMessageAPI call is assigned to thegptResponseObjectvariable. - The logic gets the
responseMessageproperty from thegptResponseObjectvariable and puts it into thegptResponseproperty ofPage Data. This in turn triggers a re-render which displays the response value in the Paragraph component.
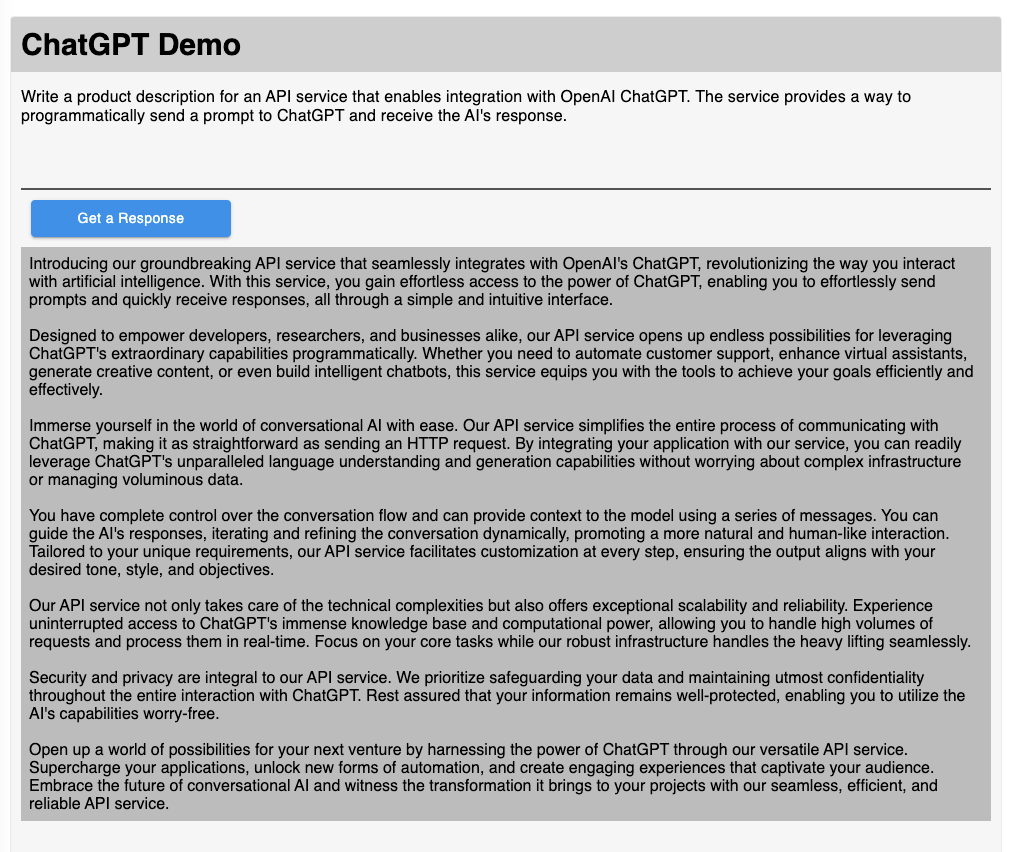
Now run the page and enjoy the power of ChatGPT in your UI Builder app:
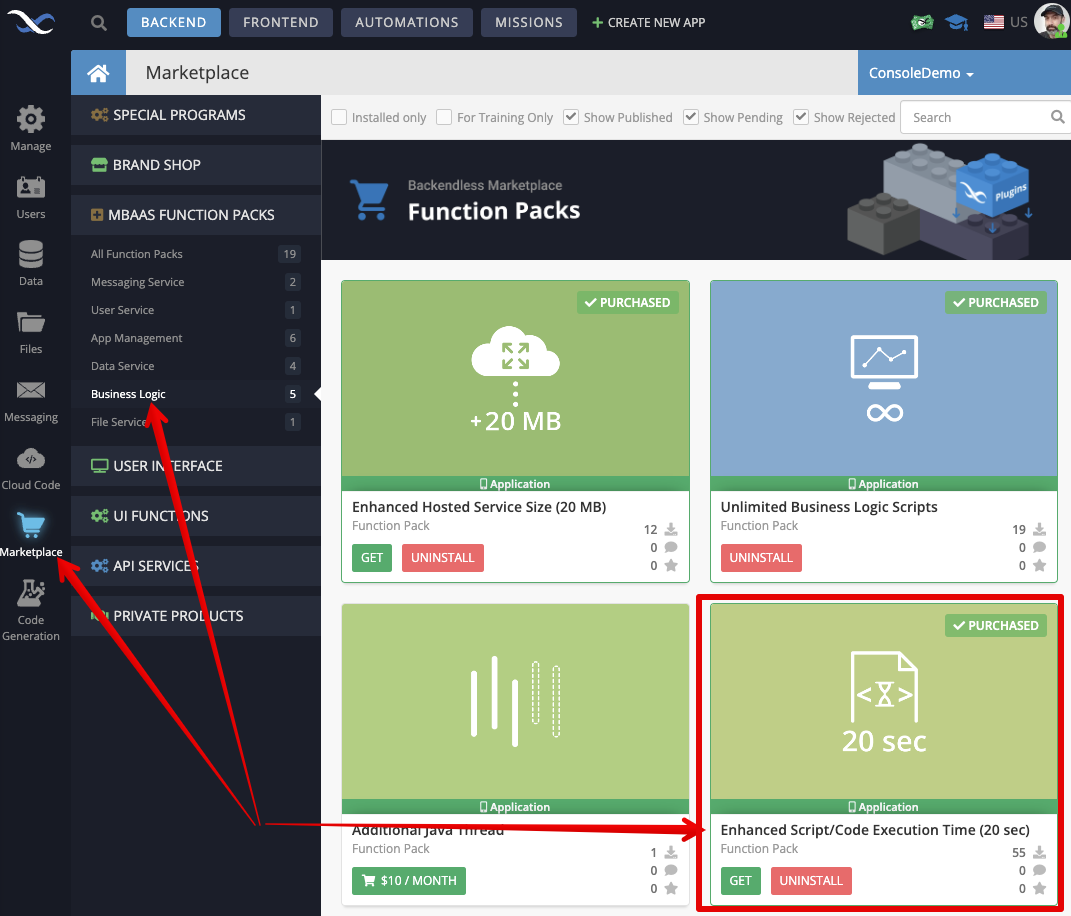
IMPORTANT: Please note that for some prompts, ChatGPT may take longer than 5 seconds to respond. This is important because the default execution time of Cloud Code in Backendless is 5 seconds. The OpenAI API service runs in Cloud Code and subsequently is subject to the limit. It is possible to expand the limit to the multiples of 20 seconds through a function page available in the Backendless Marketplace: